
Making Lady Thresh Gauntlets
- lawsoffire
- Nov 3, 2015
- 4 min read
Seeing as this was a new venture for me, I thought I'd make a quick tutorial on easy, cheap (AND LIGHT!!!) gauntlets. Thresh has two gauntlets, but I only made one for my right hand, and did super long acrylic nails on the other as I wanted to really emphasize the femininity.
Because it's a feminine version it's quite an elegant design. You can easily adapt what I've done here to a gauntlet of your choosing - to make it more masculine, make the tips blunter and make the angles roughly 90 degrees in order to get a more no-nonsense look.
You'll need:
- Thin cardboard (I used the cardboard from cereal boxes!)
- A pair of cheapy black gloves from your local dollar shop, long elbow length ones are good
- Hot glue/hot glue gun
- Masking tape (optional)
- Paint!
TOTAL COST: $5 (1 stick hot glue, a very small amount of paint, and $2 gloves).
An easy starting point is to draw around your hand on a sheet of paper and sketch where you'd like each piece (we'll call them leaves) to sit. I wanted to do something exaggerated for Thresh, so there's a lot of pointy overlap.
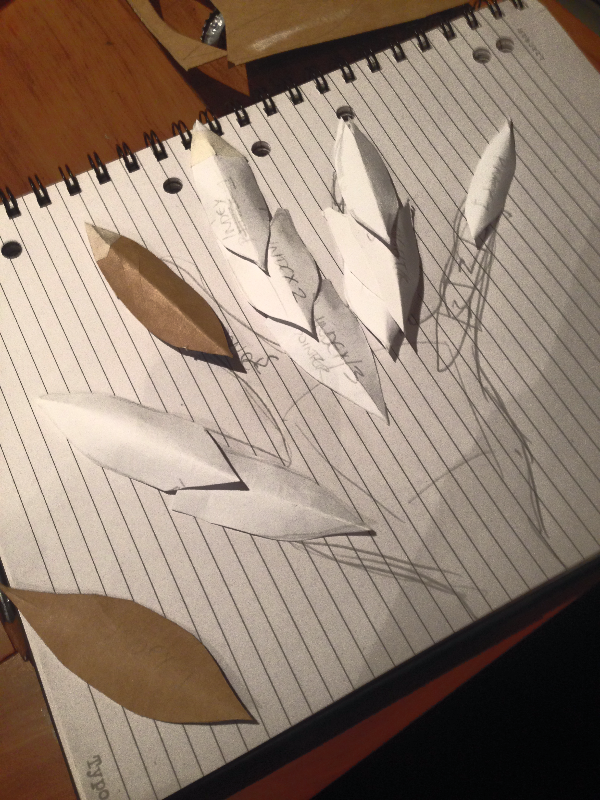
As you can see, I've drawn on the hand and labelled each leaf with a number from 1-3 to simplify the process. It gets a bit fiddly.
The leaves at the tips of the fingers have points on both ends. To make the fingertip more curved over and pointed, like Thresh's gauntlet, I cut a small split down the centre on the finger tip end. I then overlapped them slightly and stuck them back together with masking tape. This curves the corners over like claws.
So, now you've got a nice, evil curve on your fingertips. Try to keep the shape roughly the same and just decrease/increase size. I found that for my hand shape, my pointer and ring finger were roughly the same size, whilst the middle finger was longer.
Special note for your thumb -- make sure you make the second leaf long and extreme. It will be covering the side of your palm.
For the rest of the leaves going up your fingers, shape them with one pointy tip and one curved end that will sit nicely on your finger. The shapes will look something roughly like this:

I'd love to be able to just have a printable pattern, but the length and fit is completely down to your individual hand size!
A lot of this is trial and error, so cut out your pieces from paper first, and test for fit. You might find you need more coverage on the side of your finger, or that you want a longer point. Once you've got the right shapes, go ahead and cut them out of the cardboard - labelling them as you go!
Once you've cut them out, score the underside with a ruler and pen and then gently fold to get the spine along the leaves without ruining the cardboard.
Make a small cover for the back of your hand. I found this was more comfortable (and easier!) than extending it up my arm. Make sure it's not cutting into your wrist.

To make the bracer part of the gauntlet you'll need to trial and error things out with your arm size. However, the basic shape I used looks like this:
Remember to cut two or the top pattern.
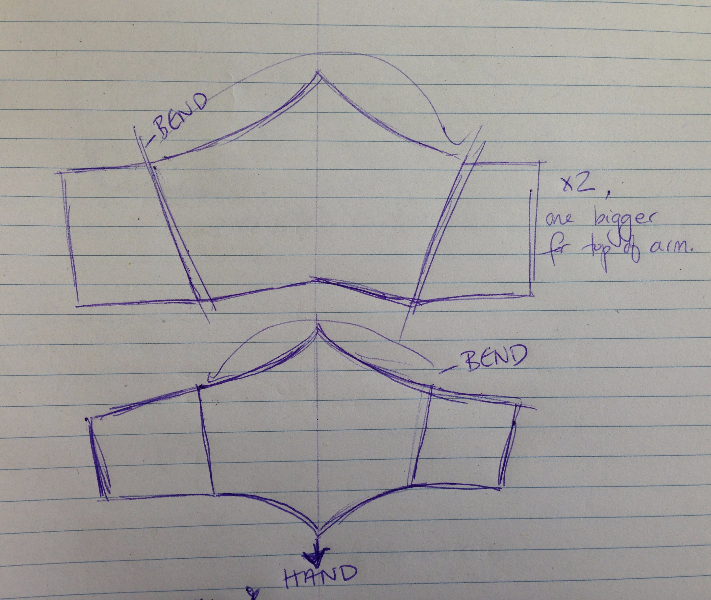
(Make sure yours are even by just sketching one side and then folding over and cutting -- my sketches above aren't even!)
You should probably have a think about how you're going to attach the pieces to the glove now before painting. If, like me, you're seriously time poor, you'll want to use hot glue. It's the quickest (and literally most painful) way to do it -- you'll attach them last because they won't be coming off!
If you're wanted a more sophisticated system of attaching the pieces you'll need to sort those out now before painting. You can use magnets sewn into the gloves and glued on the cardboard, or simply attach ribbon and thread through the gloves, or velcro.
Give the undersides a good undercoat of black paint. You can do this with spray paint, but mind that it's not glossy or it won't adhere well to your cardboard, especially if the cardboard you're using has a shiny coat.
Give the top side an undercoat of white paint. You might want to use black depending on your colour scheme, but I wanted the green bits to really glow.
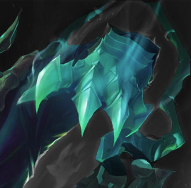
Now you're ready to start your paint job! Unfortunately I don't have any in-progress shots of this, but I did repaint the first couple quite a few times deciding on how I wanted my colours to look. Pay close attention to your character's gauntlets, highlighting and creating shadows as you go.
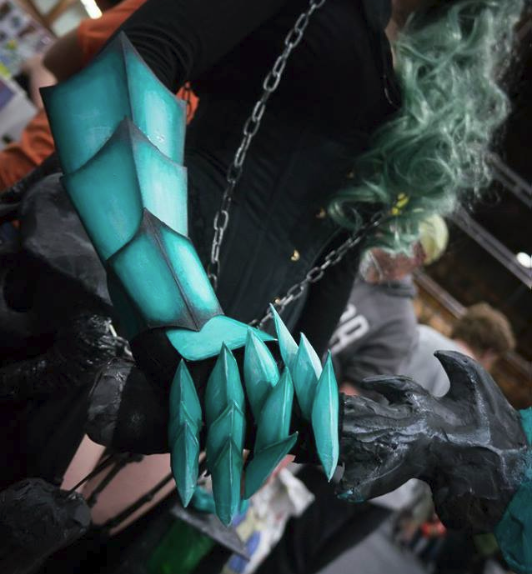
After you've done your painting, you'll need to attach the pieces. I stuck my hand in a glove, grit my teeth, and literally hot glued the pieces onto where they needed to go! I wouldn't recommend it but it's definitely a timesaver. Make sure the arm pieces are big enough for you to slip your hand through -- particularly the piece encircling your wrist. You don't want to have to rip your beautiful work to get out.
Picture of the inside of my arm so you can see the stretchy space that allowed me to get in and out of the gauntlet:

It's definitely the cheapest part of my outfit (only the cost of paint, masking tape and a few burns!) and I'd use this method for any other gauntlet I needed to make.
Anyway, I hope this helped! Let me know if you have any queries in the Contact page.
Thanks for reading,
Archai xx


Comments